Christmas Caking, Baking, Making Time!!
It is a bit early to be cooking Christmas puddings, however, Fiona (Orla's sister) came across a picture of a Santa cake! No instructions or tutorials just a picture, and Orla believed that she could make it!
So we studied the picture, and put our plan into action! We decided to make a Sponge Cake,
with jam and Buttercream filling!
We stacked the sandwich tins to find out how many layers of cake we would need to get the height needed, and 4 sandwich tins were about right, so 2 cakes worth!
We got on with making the "2" sponge cake/ "4" single sandwich tins worth. This was the recipe we used, good old "Mary Berry"!!
Leave them to cool as normal...
Remember : You have to double everything! As you have to fill and cover 2 cakes!
It seems alot of everything, buttercream etc, however you will need/use it ! Trust us!
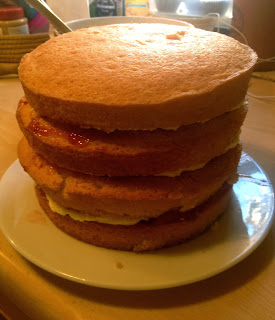
Once all the cakes are cool, start to build your tower of cake! Fill each layer like you normally would, Jam and Buttercream between each layer, once it looks something like this...
You will need to stableise it!! Take 3 straws/chop sticks and cut to the height of the cake and insert in a 'triangle' shape through the middle area of the cake.
Time to CARVE! Take a bread knife, with a serrated edge, and make a Dome shape. Try and make it as smooth as possible, it will look a bit dogy...but go with it!
You will need to give the cake a crumb coating next! Take your left over Buttercream, and go around the cake, (you may need to make some more) Making a smooth layer all around the cake. Making sure you get all the loose crumbs. (This is what makes it smooth and not lumpy when you put your layer of fondant ontop)
Then put in the Fridge! Leave until its really solid and cold!!!
LEAVE IT.....!!!! I SEE YOU!
LEAVE IT.....!!!! I SEE YOU!
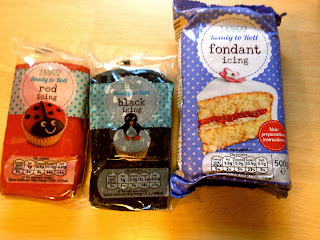
Now for the fun bit! DECORATING! Grab your Fondant, White, Red, Black...
Roll out the red into a thin circular sheet of fondant.
Using your rolling pin, roll a side of the red sheet around the pin, lift, and then drape the sheet over the cold cake. This should create this type of image...
Carefully using your fingers and cupped hands, smooth down the edges and flare out the bottom of the sheet until you cover it evenly.
TIP - (Use a pizza cutter to put around the circular cake)
TIP - (Use a pizza cutter to put around the circular cake)
Your almost there!!
Time to get fiddly with the fondant, create a thin layer of white, cover the Cake Base, Put the Red Cake on the white base...
Then create another thin layer of white, shape into a beard, and use water to stick it to the cake. Carry on making the eyes, nose, little arms, and legs with cuffs on all four. Make a little hat for Santa and finish off by making a little buckle!
If you have a red ribbon, and a little 'Merry Christmas' sign (you could pipe it on) then stick it on!
and YOU'VE DONE IT! Fun and Easy! Its a simple cake, but looks great! and We've really enjoyed making and decorating it!!!
Thanks for checking this out!
Instagram
Youtube


seriously impressive!! :) xx
ReplyDeleteAw, thanks lovely! We're so glad you like it! It tasted yummy too! ;) xx
DeleteThe cake looks amazing! x
ReplyDeleteHeather | Of Beauty & Nothingness